How to choose aquarium substrate depth and work out how much to buy
Before buying substrate, choose the material and planting zones, then decide whether the bed should be flat or sloped. This guide helps you set aquarium substrate depth and turn that profile into liters and bag quantities. The freshwater planted-tank examples use 4–8 cm to demonstrate the calculations; they are not a depth prescription for every material or animal.
Choose the material before the depth
Two products called substrate can require quite different beds. A concentrated nutrient base belongs underneath a covering layer. A complete aquasoil may be intended to form the bed on its own. Start with those instructions, then decide how much height to build into each layer.
Tropica provides a useful distinction: its Plant Growth Substrate is a 1 cm nutrient base covered by at least 4 cm of gravel, while Aquarium Soil can form the bed on its own. The 1 cm figure describes the nutrient layer, not the total depth. Check the instructions for your exact product before deciding whether it needs a cap.
For a layered bed, write down the base and cap separately before adding them together. This gives you a buying list for each material, rather than one total that could accidentally be ordered entirely as nutrient base. For mixed planting and open areas, also mark where each material will actually go.
Give the planted areas the space they need
Decide where the roots will sit before spreading a deep layer across the whole tank. A planted rear corner, an open foreground and plants attached to wood do not all use the bed in the same way. Aquarium substrate depth should follow that plan, rather than the height of the tallest leaf.
Anubias barteri var. nana and Java fern can be attached to stone or wood. If you plant them on the bottom, leave the rhizome exposed. Adding depth elsewhere will not change that requirement.
For plants that you intend to root in the bed, check their planting method and your substrate’s instructions together. Keep a drawing of the actual planting zones nearby. It is easier to change a planned zone now than to discover, after buying the bags, that the deepest part is occupied by a rock and the plants are elsewhere.
Flat bed or slope: what changes?
A flat bed gives you one height to plan and calculate. A rear slope gives you a lower front edge and a raised background. That can make the back of the scape more visible from the front, but the extra elevation uses material and reduces the space above the bed.
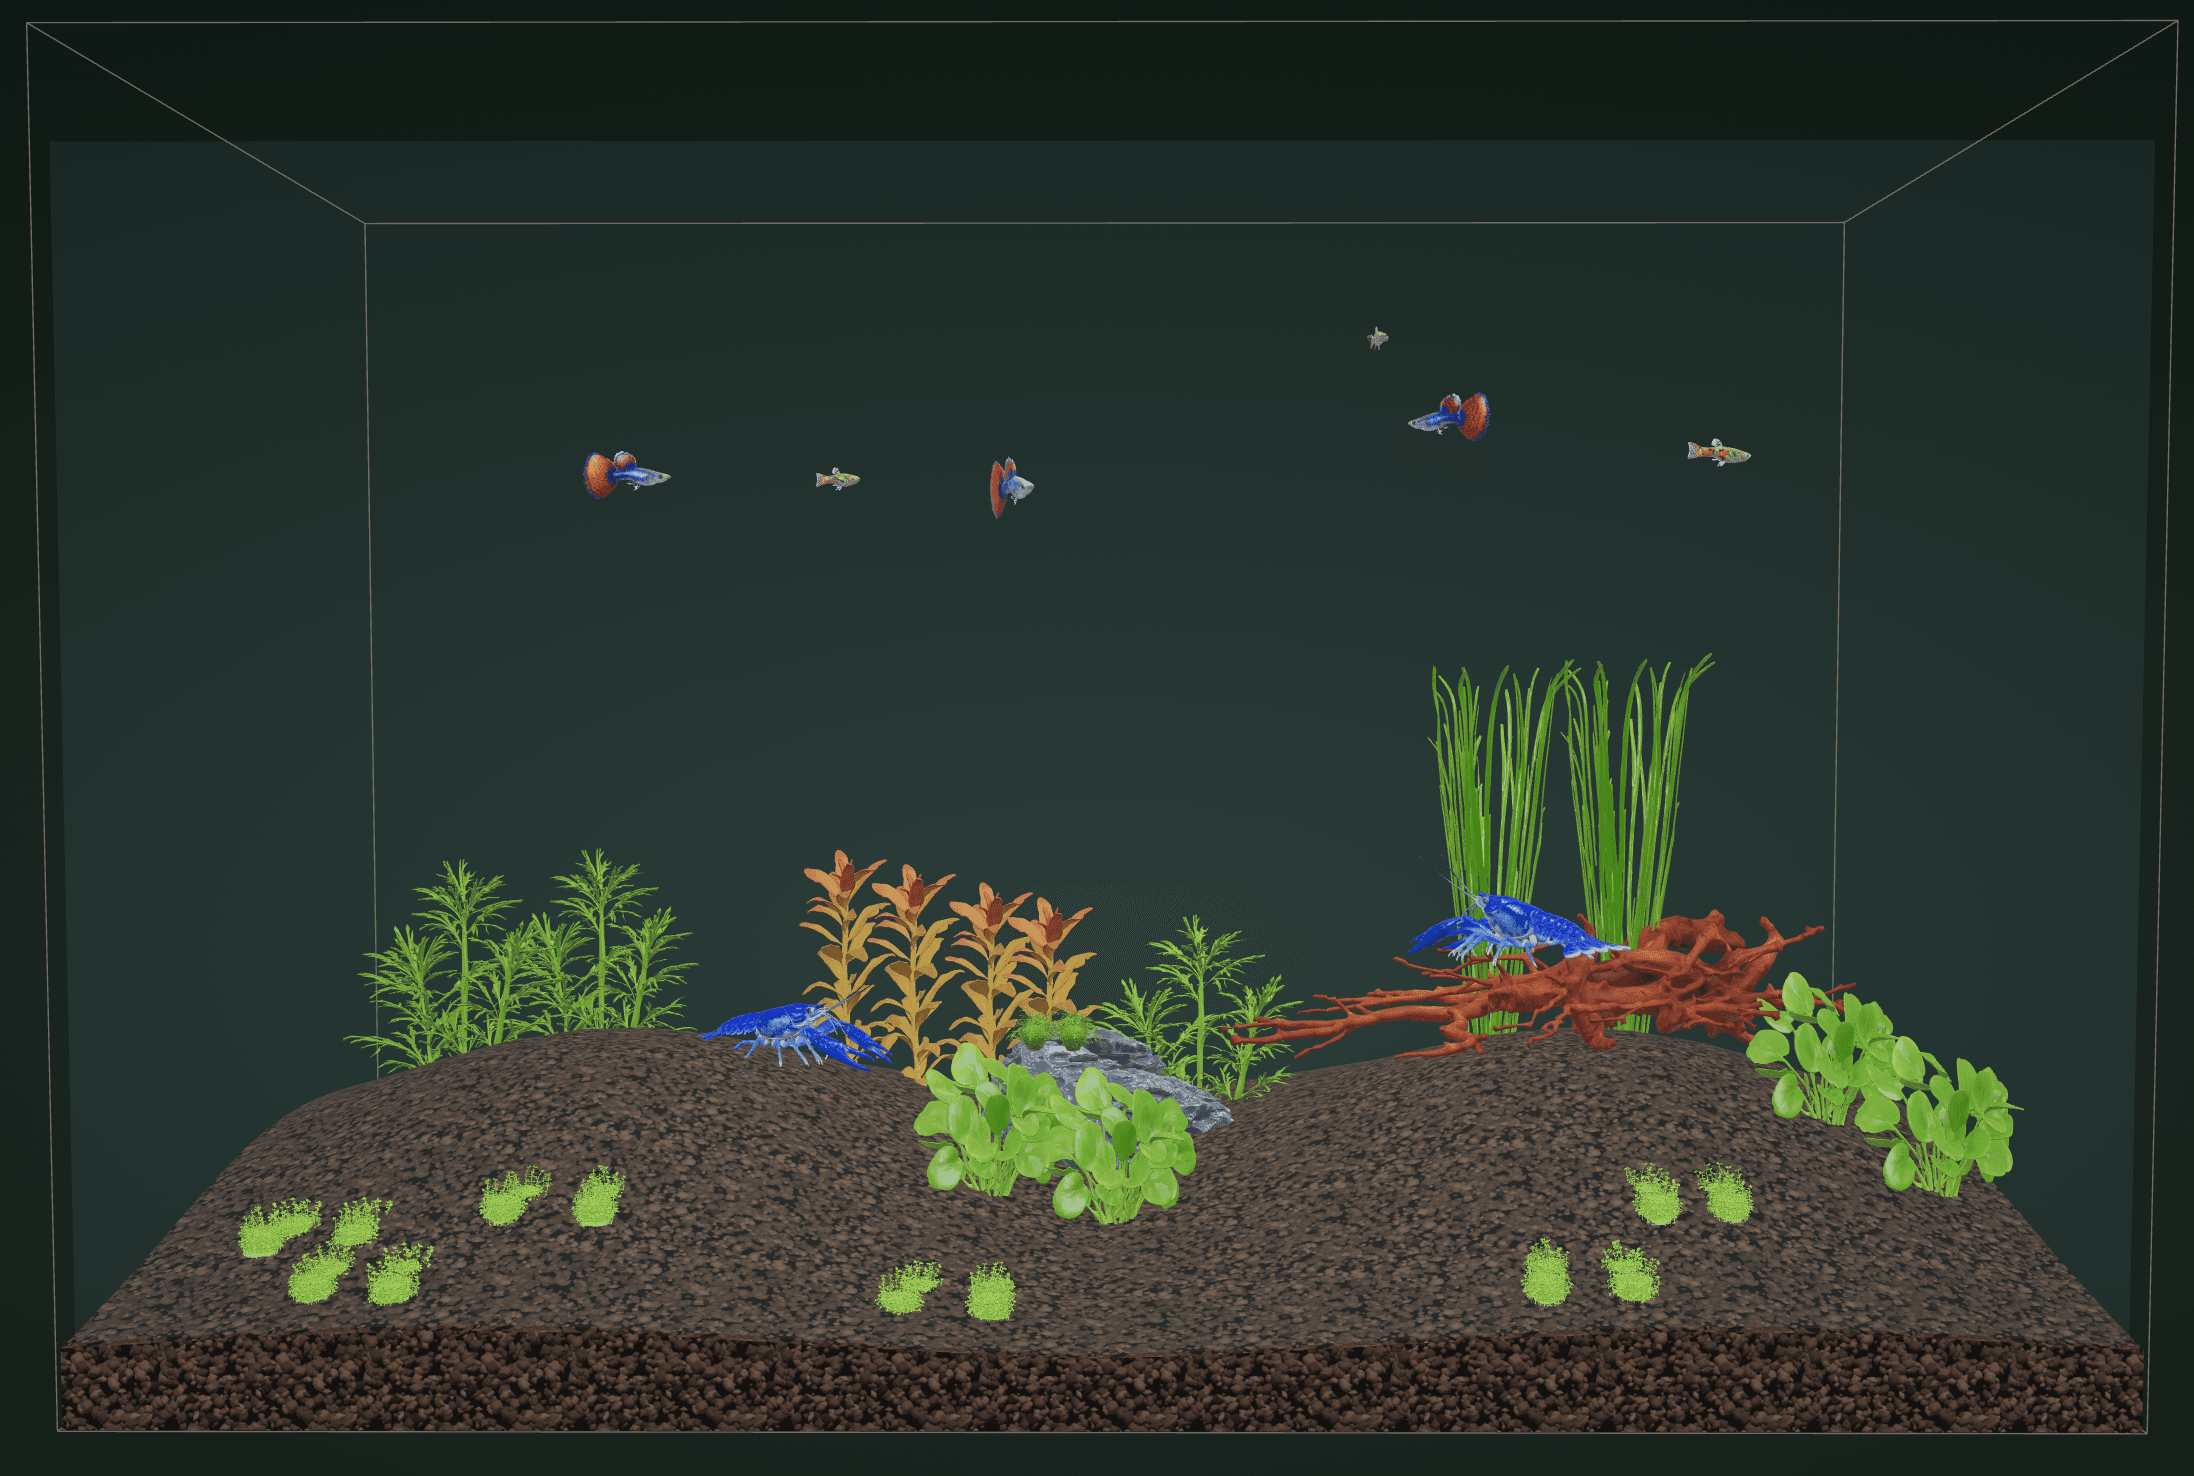
The 3D image at the top of this page shows a 60 × 30 × 36 cm tank, viewed from Angle, with 4 cm of aquasoil at the front and 8 cm at the back. We left out rocks and plants so the slope is easy to see. This is a digital planning example.
A slope is a choice about the shape of the bed, not a complete scape. You still place the rocks, wood and plants yourself. Nor does the digital profile test whether your real pile will remain in place. If you want a steep mound or a narrow path, plan its physical support separately and check it against the materials you will use.
Test aquarium substrate depth in the real controls
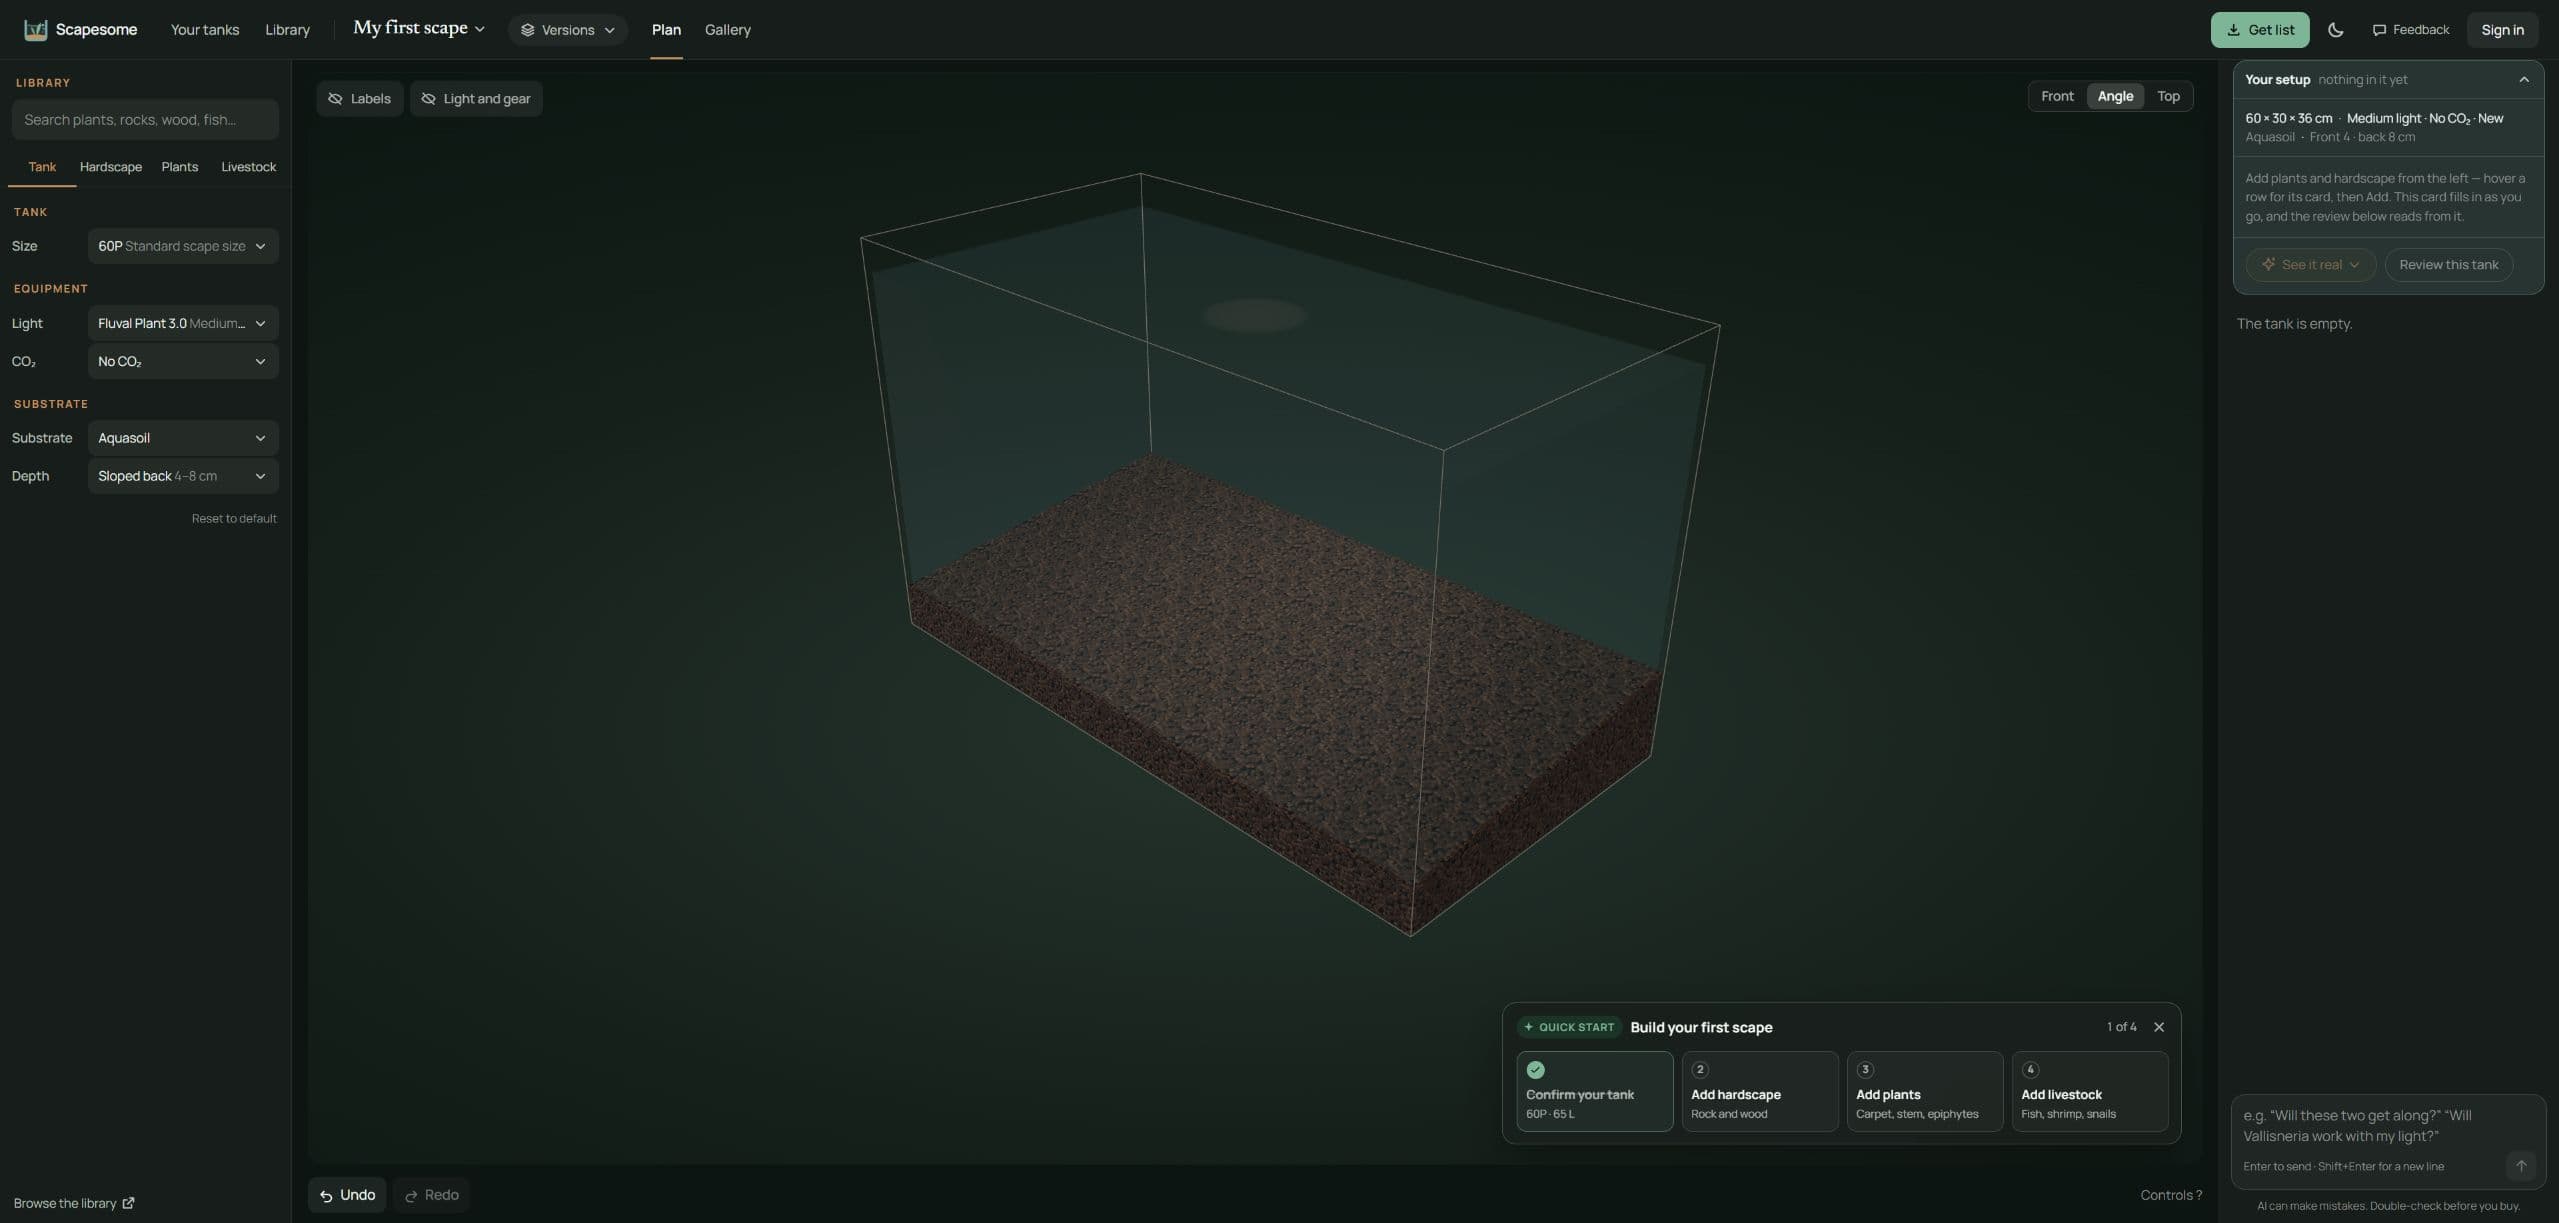
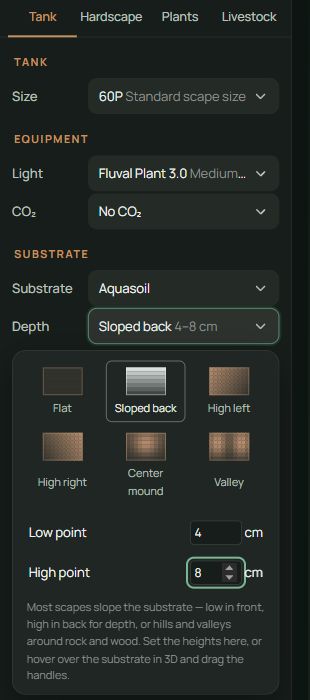
In Scapesome Plan, choose the Tank tab on the left. Under Substrate, open Depth. Flat has a Height field. Sloped back has Low point and High point fields; for that profile, the low point is the front and the high point is the back. The other available shapes are High left, High right, Center mound and Valley.
Confirm the tank’s Size and select the intended Substrate material.
Choose Flat and enter a Height, or choose Sloped back and set its Low point and High point.
Use Front to judge the visible front edge, Angle to inspect the slope, and Top to review the space you intend to plant.
Add your actual hardscape and planting groups. Revisit the bed if the objects occupy the space you had reserved.
For this example we used Flat at 4 cm, then Sloped back with Low point 4 cm and High point 8 cm. These fields let you explore aquarium substrate depth; the values are not an instruction to use that profile in every planted tank. The planner represents one selected material and an overall profile, so keep a separate note of any base-and-cap layers you intend to build.
Turn the profile into a buying estimate
For a rectangular footprint, a level bed’s volume is length × width × depth ÷ 1,000 when all dimensions are in centimeters. For a straight front-to-back slope across the whole width, use (front depth + back depth) ÷ 2 as the average.
Bed over a 60 × 30 cm footprint | Average depth | Estimated volume |
|---|---|---|
Flat at 4 cm | 4 cm | 7.2 L |
4 cm front, 8 cm back | 6 cm | 10.8 L |
Flat at 6 cm | 6 cm | 10.8 L |
The last row is the useful catch: the slope and a level 6 cm bed use the same estimated volume, yet they leave different heights for planting and viewing. Aquarium substrate depth is a distribution decision as well as a quantity decision. Choose the profile you want, then calculate it.
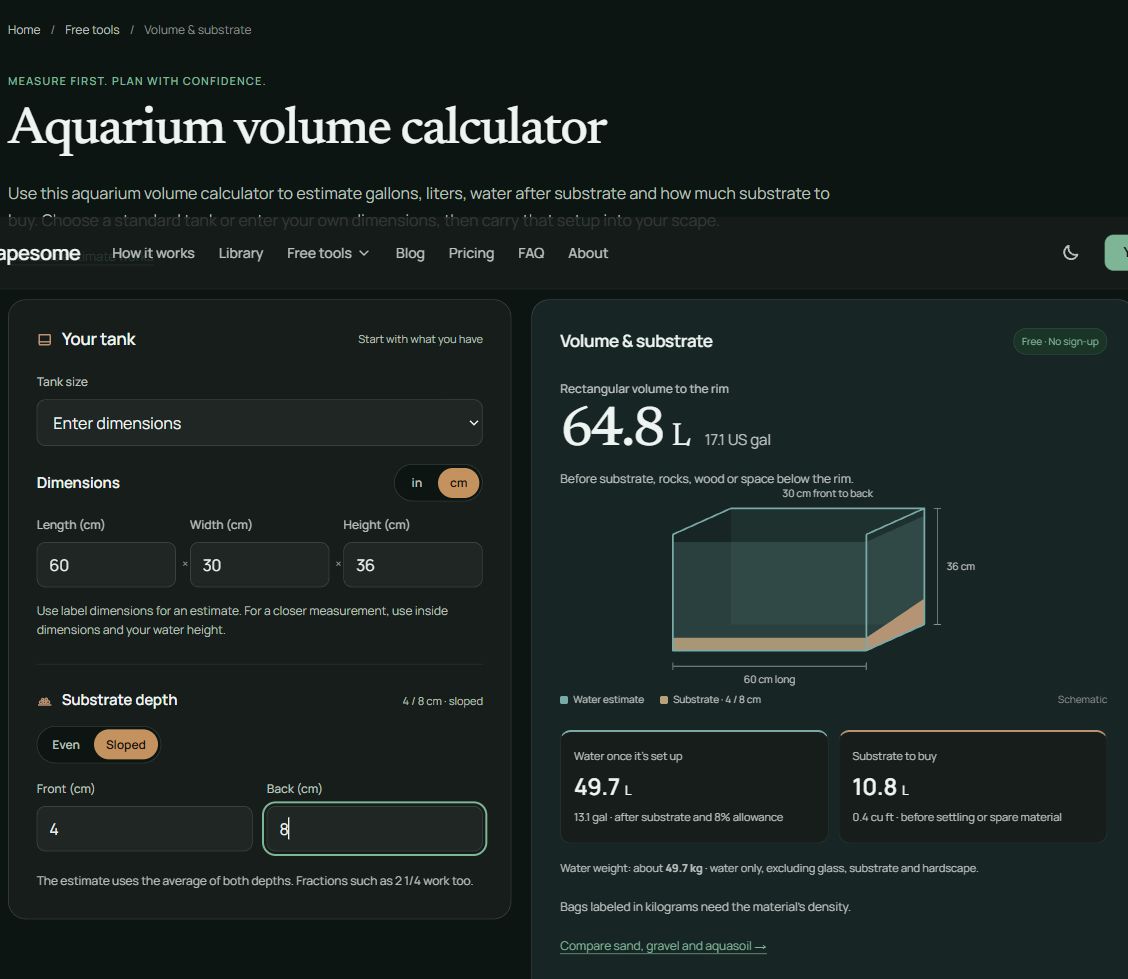
You can repeat the example in the volume and substrate calculator: select cm, enter length 60, width 30 and height 36, choose Sloped, and enter Front 4 and Back 8. The current tool returns 10.8 L of substrate before settling or spare material.
A mound, valley or partly filled planting pocket is not a full-width straight slope. Do not apply the same average-depth shortcut blindly: divide the bed into measured sections, or use a more detailed volume estimate. Buried rock and support material can also change how much substrate occupies that shape.
Compare the estimate with the volume printed on the bag. For the 10.8 L example, two 6 L bags give 12 L before settling or changes to the scape. A bag sold by weight needs that product’s volume or bulk density; 10.8 L is not automatically 10.8 kg. Review the allowance before ordering instead of treating the rounded bag count as an exact fit.
Before you pour the first bag
Write down four things: the exact material, its layer instructions, the front and rear heights, and the places where plants will root. If a layer is doing double duty as nutrition and elevation, check that both jobs fit the product’s instructions. The aquarium substrate depth you see at the front is only part of that plan.
Then check the materials in the substrate library and carry the profile into your own scape. If the next decision is where to place the main stone or leave an opening, the aquarium layout guide covers those steps. Set the bed first, place the objects, and adjust while it is still easy to change.
Product guidance: substrate setup · Aquarium Soil.
Product controls and linked manufacturer guidance checked on October 14, 2026. The images show a digital substrate profile, its controls and a calculator example.