How to plant Java fern on rocks or wood
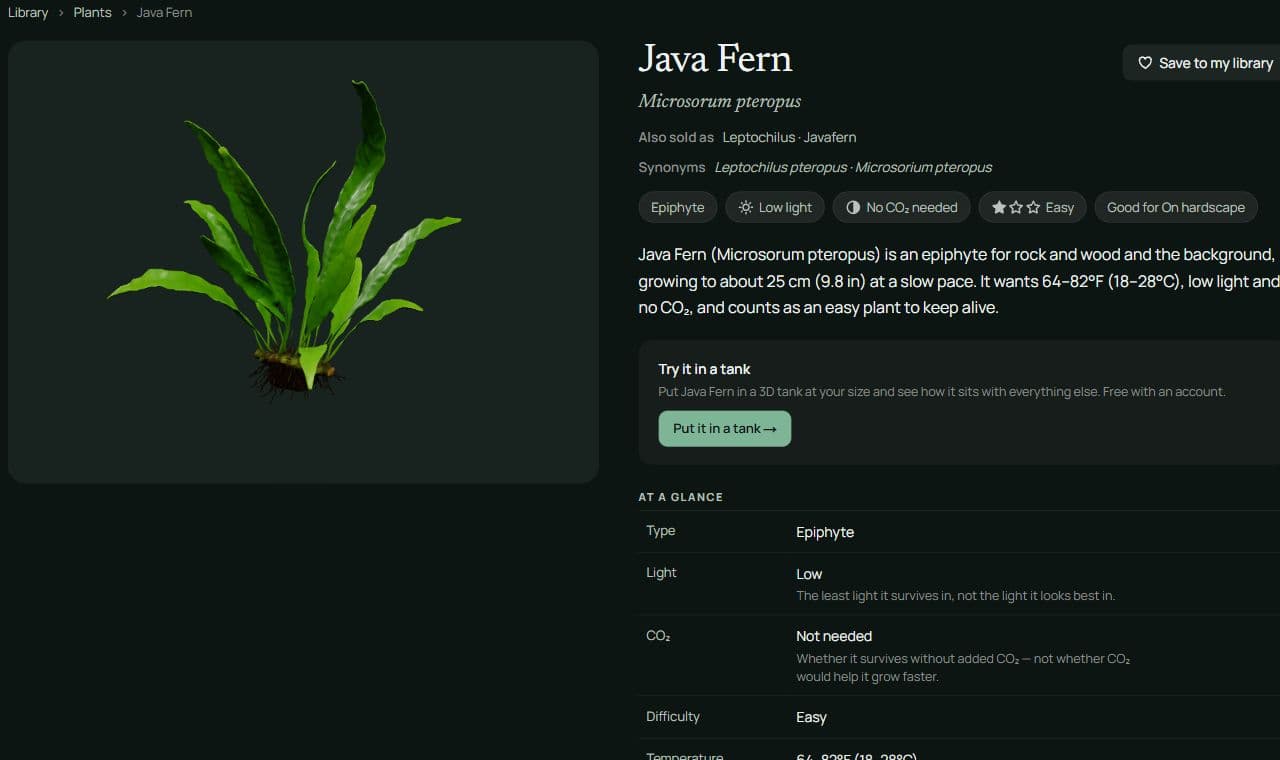
Java fern in Scapesome's plant library. This existing model shows the plant's overall form; use the actual plant in your hand to identify its rhizome.
A pot makes Java fern look like something that belongs in a hole in the substrate. That is the part to question before planting it. The roots can reach down, but the thicker horizontal stem they grow from needs to stay exposed.
You can attach Java fern to a rock or a piece of wood, leaving that stem clear of sand and gravel. The practical job is finding a position where the plant stays put without being buried or squeezed, and where its leaves have room above it.
Find the rhizome before choosing a spot
Look for the firm, horizontal stem connecting the leaves and roots. That is the rhizome. The thin roots underneath are different structures. When instructions say not to bury the plant, this stem is the part that must remain uncovered.
Gently remove the plant from its container and separate loose packing material so you can see how it is assembled. Do not assume the whole bundle is one plant or pull hard at a section you cannot identify. A clear view of the stem makes the next decision much easier: which side can sit against a support while the leaves point into open space?
The Java fern entry is useful for checking the growth form and placement. If you bought a named variety, check that exact label as well. A narrow-leaved fern and a broad, taller form can occupy quite different amounts of the same hardscape.
Try the position while you can still move it
Rest the plant against the proposed rock or wood before tying or gluing anything. Let the leaves take their natural direction. A position that looks neat when the fronds are held upright may look crowded once you let go.
Check three things from the normal viewing side: the stem is visible rather than pushed into a dark crevice; the leaves clear the glass; and you can still reach around the plant to clean. Then look from above. A broad leaf can hide an opening that seemed generous from the front.
A removable rock is often a convenient starting support because you can work on it outside the tank and adjust its orientation. If you prefer to attach directly to a large piece of wood, settle that wood's position first. You should not have to twist the plant against its attachment every time the hardscape moves.
Choose a fixing method you can inspect
Tie it while the roots gain a hold
Fine line or suitable thread can hold the roots against a support. Use enough restraint to stop the fern drifting away, without cinching tightly across the rhizome or leaf bases. Keep the fastening tidy and follow the material supplier's guidance for aquarium use.
After placing it, check that the plant stays in the position you intended and that no loose loop is hanging out into the tank. Revisit the fastening as the plant settles. There is no need to hide every part of the stem under an extra wrap simply to make the attachment less visible.
Use a small amount of suitable aquarium glue
An aquarium-appropriate cyanoacrylate gel is another option. Follow that product's directions, including its setting instructions. Where practical, attach the roots to the support rather than coating the horizontal stem. A little controlled contact is more useful than covering the plant's base in glue.
Hold the parts in the intended orientation while the adhesive sets as directed. If the contact keeps slipping, reconsider the contact point rather than adding layer after layer. Glue that has set on an inconvenient part of the plant is harder to undo than an awkward trial position.
Can the roots go into the substrate?
The roots may extend into the substrate while the rhizome remains above it. That does not mean pushing the whole plant down until it stands unaided. If the only way it stays upright is to bury the horizontal stem, use a support instead.
This also changes what you need to buy. A fern attached to wood is not using a patch of expensive substrate as its planting anchor. Its nutrition still needs attention, but hiding aquasoil beneath the entire fern-covered area does not solve the fastening problem.
If you also want a planted foreground, plan that separately. The guide to carpet plants without CO2 injection covers a different task: choosing rooted plants for a specific area of the floor. A fern on hardscape can sit above that area without being planted in the same way.
Check the plant after fixing it
Before leaving the arrangement alone, look again at the stem and the leaf bases. They should remain exposed and free of a tight wrap or a thick coating of adhesive. Make sure the support itself sits securely; attaching a fern to a rock does not make an unstable rock group safe.
Black marks beneath Java fern leaves can be reproductive structures, rather than damage. That observation does not identify every dark patch or explain a deteriorating plant. If you see a problem, inspect the actual tissue and growing conditions instead of changing the attachment on the strength of one color alone.
For the overall placement, return to the aquarium layout guide and check what the fern will cover. Keep the feature you wanted to see visible, leave a route to the glass, and let the rhizome remain above the substrate. A fastening that is easy to inspect is a better starting point than one hidden so well that you cannot tell what it is doing.