Iwagumi Stone Placement: Where Should the Smaller Rock Go?
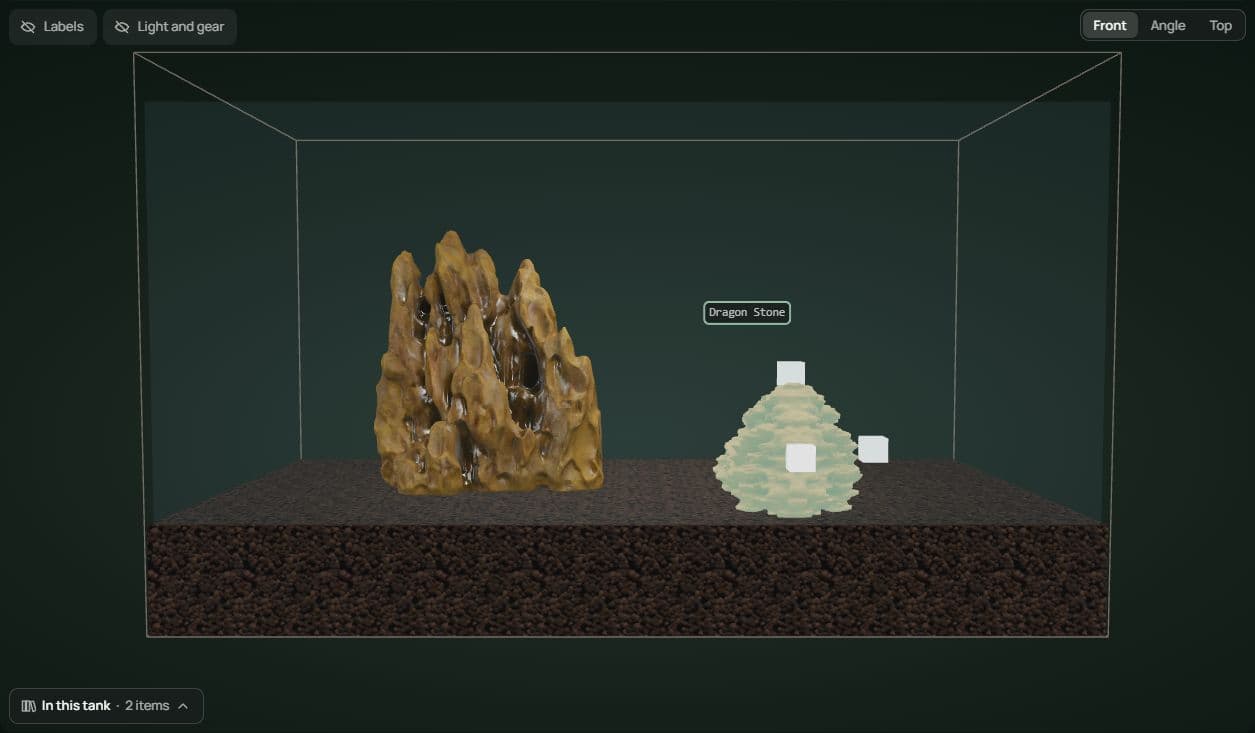
If a support stone seems to compete with the main stone, try moving it away from the front glass before you replace it. I tested that move with two Dragon Stone models in a 60P plan. The smaller stone receded in the front view, but it was still visibly separate from the main stone. That distinction is useful before you build a whole rock group around it.
The two stones I compared
I used the 60P preset, a 60 × 30 × 36 cm model tank, with a flat bed. Both rocks came from the Dragon Stone entry. I set the main piece to 18 × 20 × 12 cm and the smaller piece to 10 × 9 × 7 cm, in length, height and depth order. I kept the main piece, both sizes and the front camera fixed. The only change was the smaller stone's position between the front and back zones.
This is a two-stone placement exercise. A complete Iwagumi can use more stones and planting. The comparison isolates one decision you can make before adding those pieces.
Repeat the move without changing the camera
Open the 60P preset in Scapesome Plan and choose a flat bed. Add two Dragon Stone models. Set their length, height and depth to 18 × 20 × 12 cm and 10 × 9 × 7 cm.
Choose Front. Place the larger stone first and keep it selected only long enough to check its size. Then select the smaller stone.
In the smaller stone’s Position controls, choose Front and take a screenshot. Choose Back and take a second screenshot without moving the camera or changing either size.
Compare the smaller outline against the main outline in both images. Look separately at how much attention the small stone takes and whether the two shapes form a group.
The white handles in the images identify the selected support stone. The change in apparent size comes from its depth in this view. If you enlarge the rock at the same time, you lose the comparison you were trying to make.
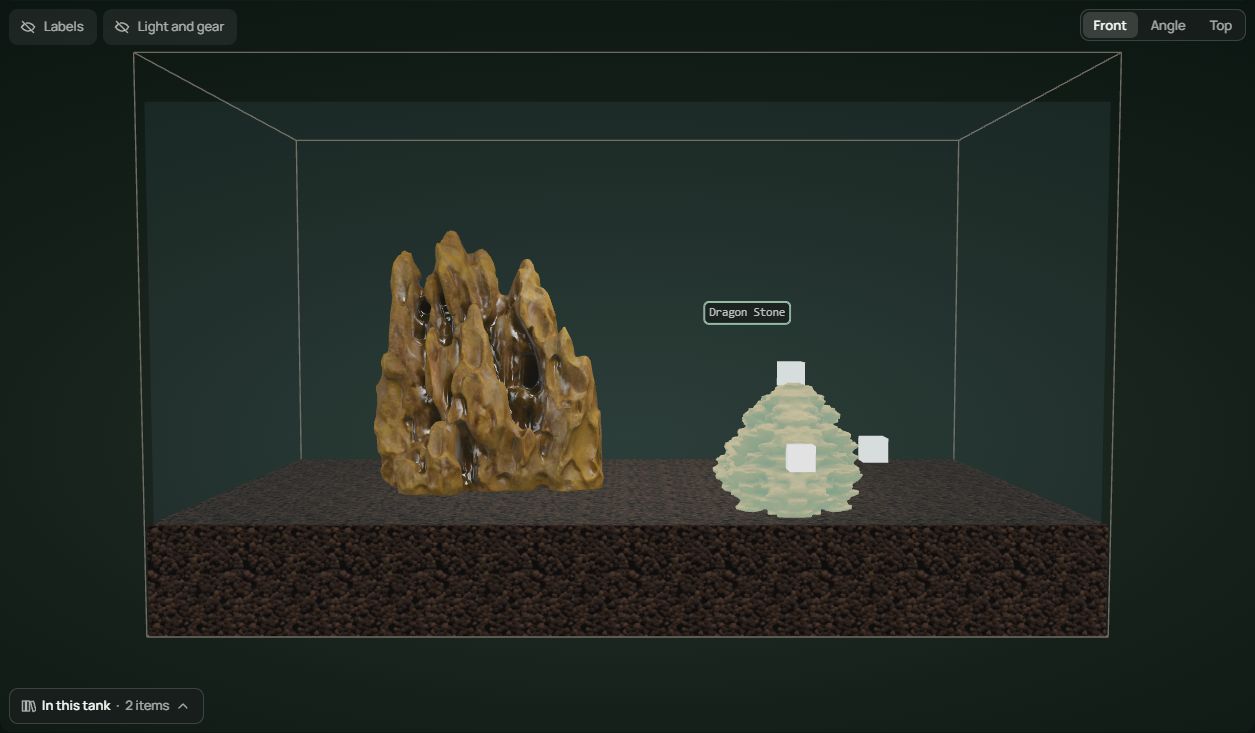
The support stone in front. It sits low in the frame but has a strong presence of its own. Selection handles identify the rock that moved.
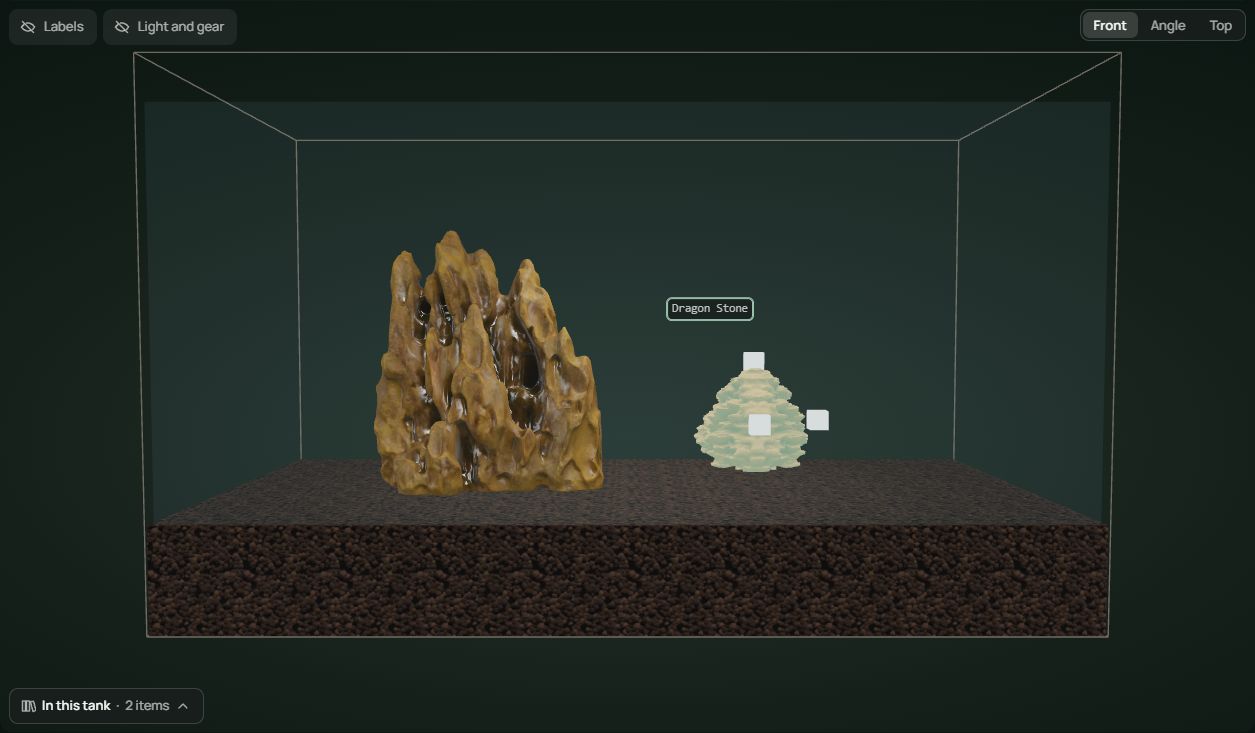
The same support stone farther back. It looks smaller, and the gap between the outlines is still visible.
What the move fixed, and what it left open
The farther position reduced the smaller rock's visual weight without changing its dimensions. If your problem is that both rocks are demanding equal attention, that can be enough. If you want them to read as one group, moving straight back may not get you there. In this test, the smaller rock still had clear space between it and the main one.
What you see in Front | The next change to try | What to compare |
|---|---|---|
Both stones seem equally prominent | Keep the small stone farther back | The main stone should retain the stronger outline |
The small stone recedes but feels detached | Try a sideways move, keeping depth fixed | A deliberate gap or overlap between the silhouettes |
The two edges almost touch | Adjust the small stone’s angle | Whether the narrow contact becomes easier to read |
Make that a separate decision. Take the front view you prefer, then try a small sideways move or rotate the support stone. Compare the outlines again before touching the main stone. If two edges meet in a narrow tangent, you may prefer a little overlap or a more deliberate gap. Then check from above. The angle you like from the sofa still needs room for planting and glass cleaning.
Try it before you buy another piece
Set up the main stone first and take one photo from where you'll normally see the tank. Put the support stone nearer the front and take another. Move it farther back, leave the camera where it is and compare the same area of both photos. If you plan a low carpet, use a strip of paper at its intended height to check how much of each stone will remain visible. The plan above left plants out so you can see the placement difference directly.
Stop once the comparison answers your immediate question. Keep the two photos beside your material list, with the support stone’s dimensions written down. When you see real pieces in the shop, use those dimensions as a rough size check and compare their actual shapes before buying. A similarly sized stone with a different face can change the arrangement again.
ADA's Iwagumi composition notes describe roles for the main and companion stones. Use those roles to judge what each shape contributes. Once you have real stones, follow the pre-gluing hardscape checks for access and physical support. These digital views don't test whether the pieces will sit securely.
Placement comparison recorded in Scapesome Plan on November 9, 2026.